The Gray Pixel
Photoshop Tutorial - Grunge Metal Illustration
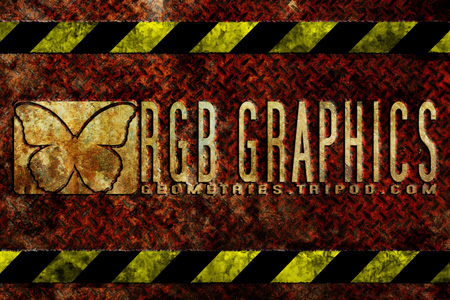
The following is an example of the finished product of this tutorial.
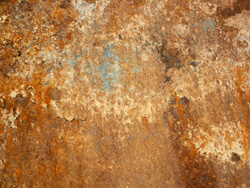
1. Before we get started we need to collect some resource images for out project. Here are samples of the images that I used. I am sure you will find different images than my own so it will make your final image even more unique.
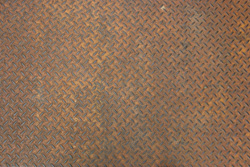

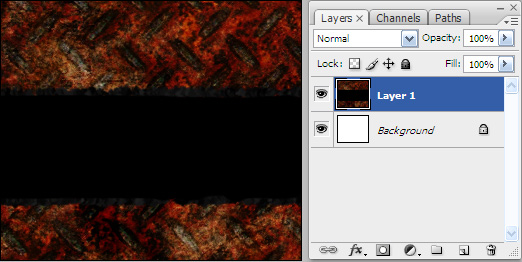
2. Create a new document in Photoshop. The dimensions do not matter. My original image was 1536px x 1024px. The background image for our document is going to be the diamond plate.
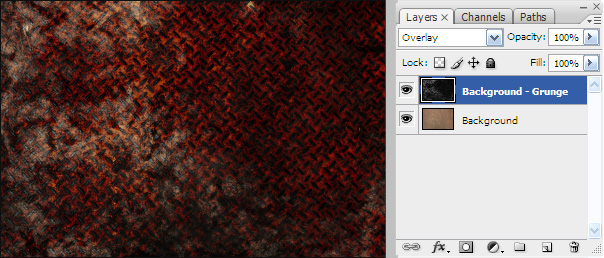
3. Create a new layer above your background and set the blend mode to 'Overlay'. Press 'D' to reset your foreground and background colors. On this layer start painting grunge. If you do not have any good grunge style brushes, you can search some really nice brushes on Deviant Art Deviant Art.
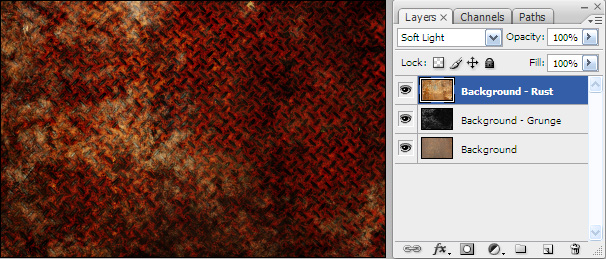
4. Create a new layer with the blend mode set to 'Soft Light'. On this layer place your rusty metal image.
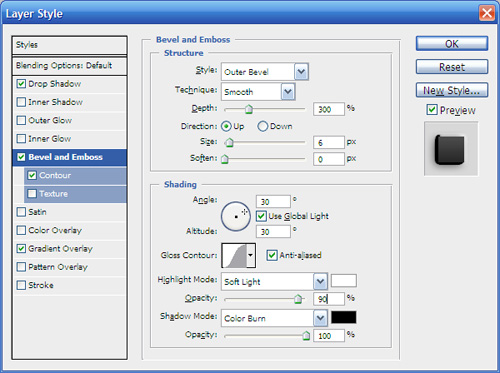
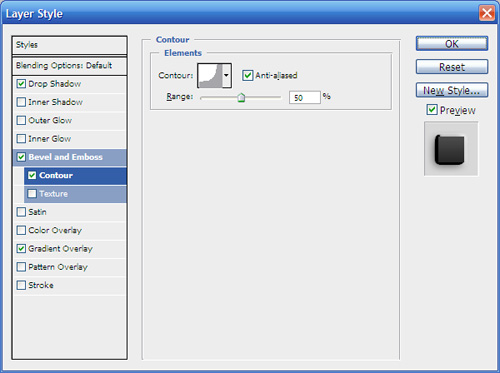
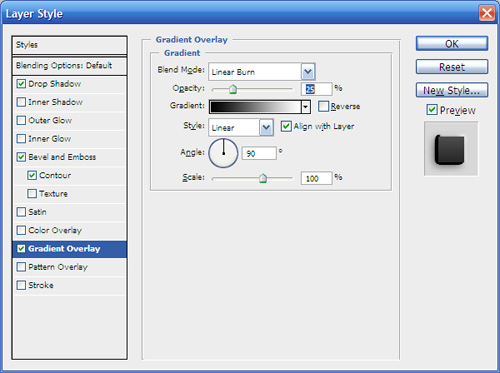
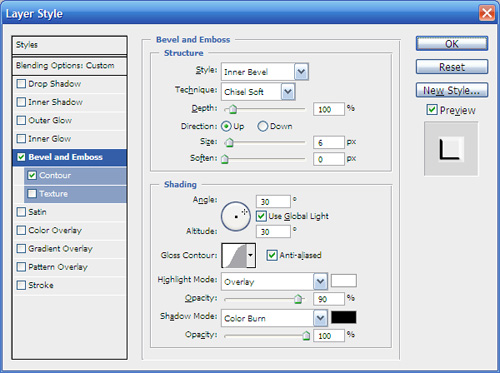
5. Now we are going to create the warning stripes. Create a new folder and name it 'Warning Stripe - Bottom'. Within this folder create a new layer and draw a series of stripes.
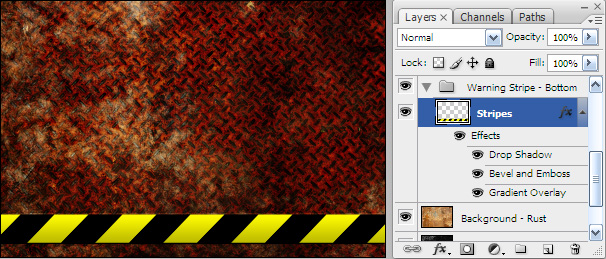
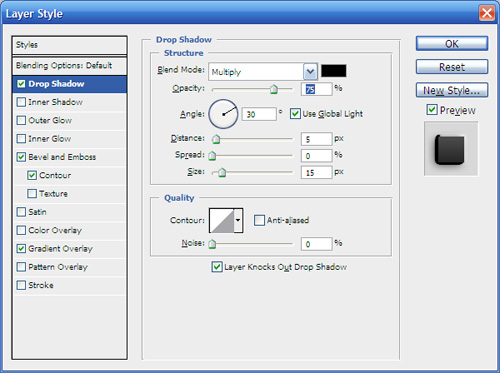
Now apply the following layer styles.
6. Create a new layer under the 'Stripes' layer. This layer is going to be our 'Weld' layer. Set the blend mode to 'Screen'.
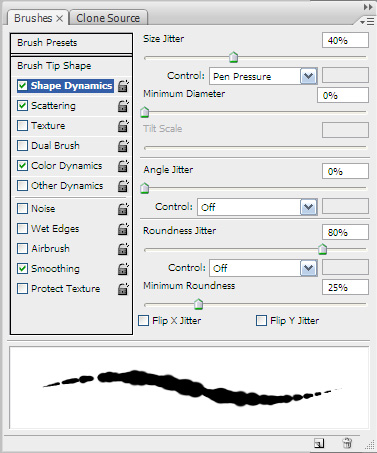
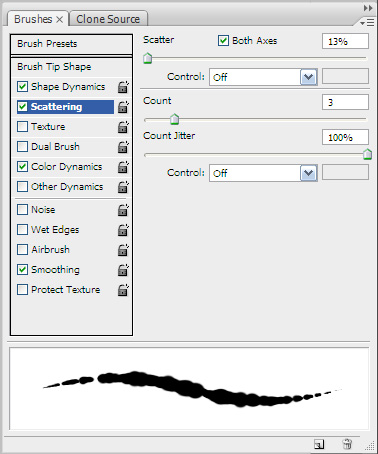
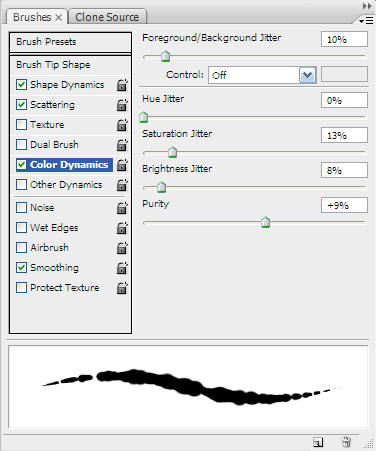
This part is probably the trickiest part of the whole project. Select the 'Hard Round 5 Pixels' brush then make the following modifications to the brush.
Using your new brush draw a line along the top and bottom edge of the stripe. This can easily be done by holding the shift key as draw the line across the screen.
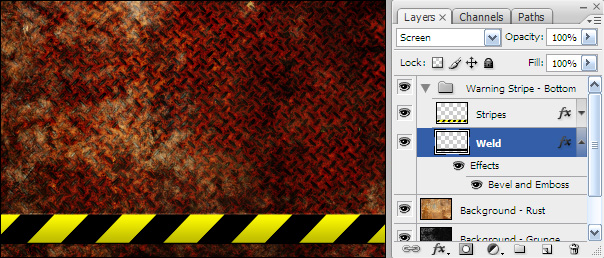
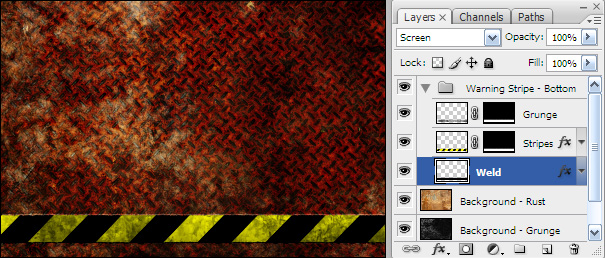
7. After applying the following layer styles to the 'Weld' layer you should have something like below.

8. Create a new layer above the 'Stripes' layer. Set the blend mode to 'Hard Light' and name the layer 'Grunge'. Press 'D' to reset your color palette. Now select one of your grunge brushes and begin painting until you are satisfied with the look. Now Ctrl-Click on the 'Weld' layer to select the layers content. On the menu click 'Select', 'Transform Selection'. We want to vertically shrink the selection by just a small amount. Now make sure the 'Grunge' layer is selected then click the 'Add a layer mask' button. Now select the 'Stripes' layer and click the 'Add a layer mask' button. You should have something like the following.
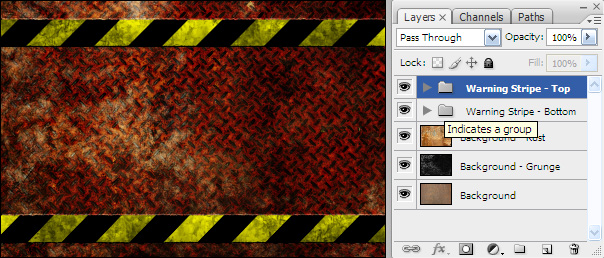
9. Duplicate the 'Warning Stripe - Bottom' folder and name it 'Warning Strip - Top'. Select the 'Warning Strip - Top' folder and press Ctrl-T. Move the selection close to the top, and then invert the selection both horizontally and vertically.
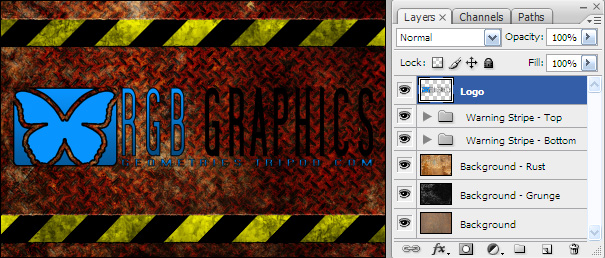
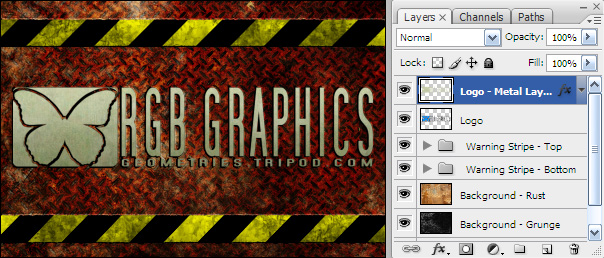
10. Create a new layer above the stripe folders. This layer is going to be your reference layer for whatever image and/or text that you want to display. In this example I am using one of the logo designs for my website so for reference purposes it will be name 'Logo'.
11. Create a new layer above the 'Logo' layer and name it 'Logo - Metal Layer 1'. On this layer place a copy of the streaked metal image. Adjust the image so that it covers the 'Logo' layer. Ctrl-click the 'Logo' layer to select the layers content. Ctrl-Shift-I to invert the selection then press delete to remove unwanted portion of the streaked metal image. Apply the same layer style that was used earlier on the warning stripe. By now your image should be close to the following.
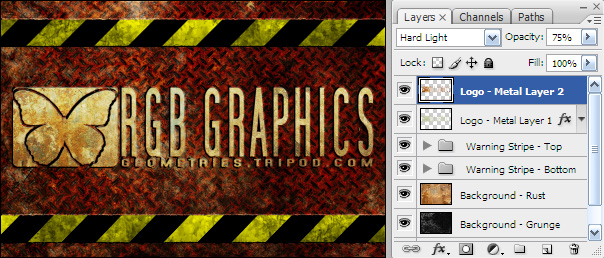
12. Create a new layer above the 'Logo - Metal Layer 1' layer and name it 'Logo - Metal Layer 2'. On this layer place a copy of the rusty metal image. Adjust the image so that it covers the 'Logo' layer. Ctrl-click the 'Logo' to select the layers content. Ctrl-Shift-I to invert the selection then press delete to remove unwanted portion of the rusty metal image. Set the blending mode to 'Hard Light' and the opacity to 75%.
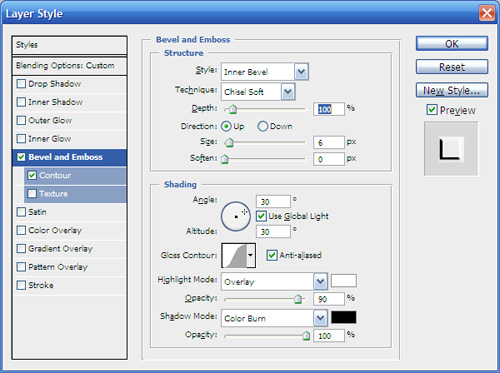
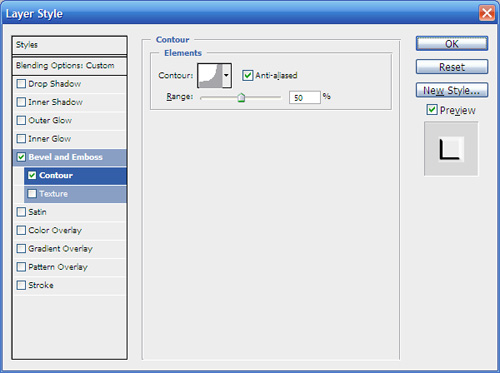
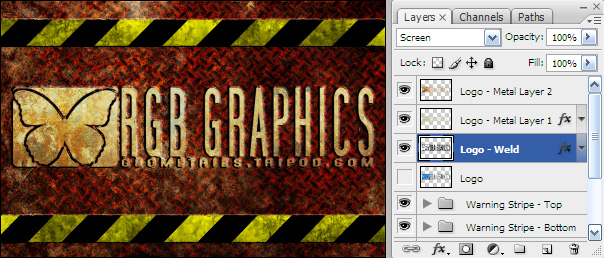
13. Create a new layer below the 'Logo - Metal Layer 1' layer and name it 'Logo - Weld'. Ctrl-click the 'Logo' to select the layers content. Press M and right-click on the current selection. Click on 'Make Work Path' and click 'Ok'. Press P and right-click on the current path. Select 'Stroke', use 'Brush', uncheck 'Simulate Pressure' box if it is selected, and click 'Ok'. Apply the following layer style.
We are getting close to finishing with our project.
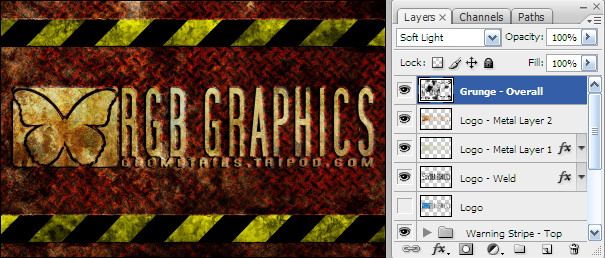
14. Create a new layer at the top of stack and name it 'Grunge - Overall'. Set the blend mode 'Soft Light'. Press D to reset the color palette. Now select various grunge brushes and begin painting and have fun.
I hope you enjoyed this tutorial and find it useful.