The Gray Pixel
Photoshop Tutorial - Oblivion Text Effect
The following is an example of the finished product of this tutorial.

1. Create a new Photoshop document 2048x880. Paint the background layer black.
2. Select the text tool and enter your text. For the sake of this tutorial enter RGB Graphics. In my example the font is Bookman Old Style, Bold, size 240px, white. After you enter the text select the text layer, duplicate it by pressing Ctrl-J. Hide the original text layer, and rasterize the duplicated layer. At this point you should have the following.

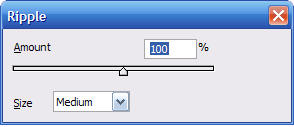
3. Now we need to create the rough edge of the text. Select filter and ripple. Use the following parameters.
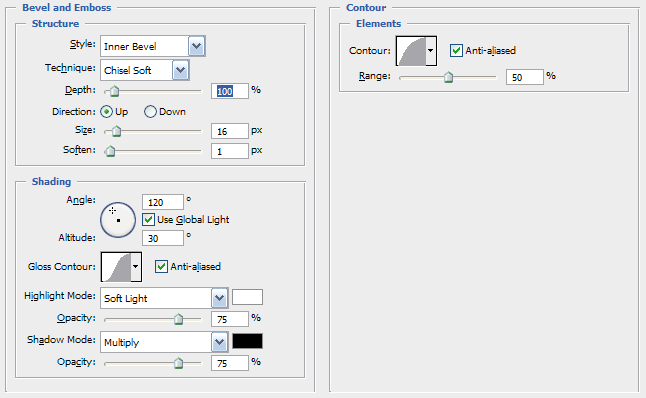
4. Add the following layer effect to the text. One thing to remember is that if you use a different font or size of font you will want to adjust the bevel so that the bevel meets in the middle of the letter. Also to make the bevel more interesting try changing the contour selections.
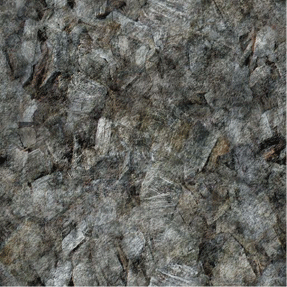
5. Now you will need a rock texture/pattern. The following is a sample of the texture that I used in my own image. You will want to make a new layer and place it under your text layer. Fill this layer with your texture/pattern.
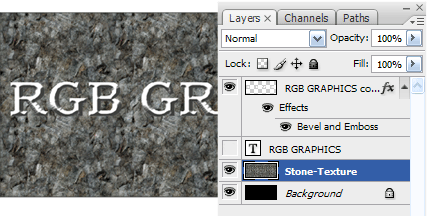
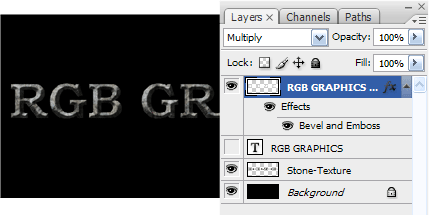
6. At this point your layer structure should look like the following.
7. Ctrl-click on the text layer. This will make a selection around the text. Press Ctrl-Shift-I to invert the selection. Select the texture layer and press delete. Change the blend mode for the text layer to Multiply. Save your work because we will need this file for a step later.
8. Now we need to create the cracks in the letters. Create a new layer above your text layer. Fill with a white to black gradient.

Select filter, render, difference clouds.
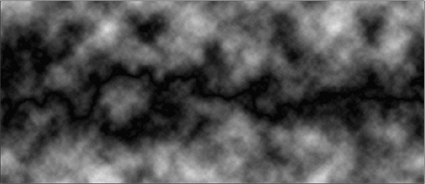
Press Ctrl-I to invert then Ctrl-L to open the Levels Window. Change the first input level value to 252. You should have something like the following. BTW, this is a great method to make lightning.
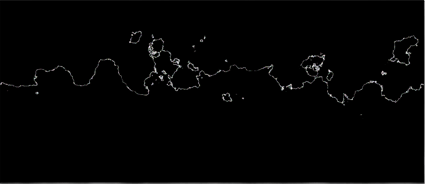
Now we need to copy this image into the mask layer. Right-click on the layer and select Apply Layer Mask. You should have something like the following.

Now we are going to use this lightning layer to create the cracks. Use the Free Transform tool to place the lightning over a portion of the text. Duplicate the layer multiple times moving and rotating the various lightning layers over text to suit your own taste.

Merge all of the lightning layers into a single layer. At this point we could apply some layer effects and the effect would be pretty good. What we want to do is distort the lightning to so it looks like it is apart of the letters. Earlier I asked you to save the your work now we are going to use that file. Select Filter, Distort, Displace.
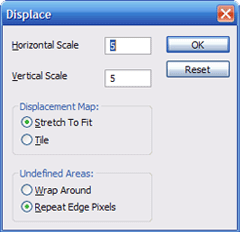
Use the above settings then click Ok. When the file dialog window opens browse to the file you saved earlier. The change in the lightning is subtle but I think it helps improve the look. Ctrl-click on the text layer. Ctrl-Shift-I to invert the selection. Select the lightning layer and press delete.

Apply the following layer effects to the lightning layer.
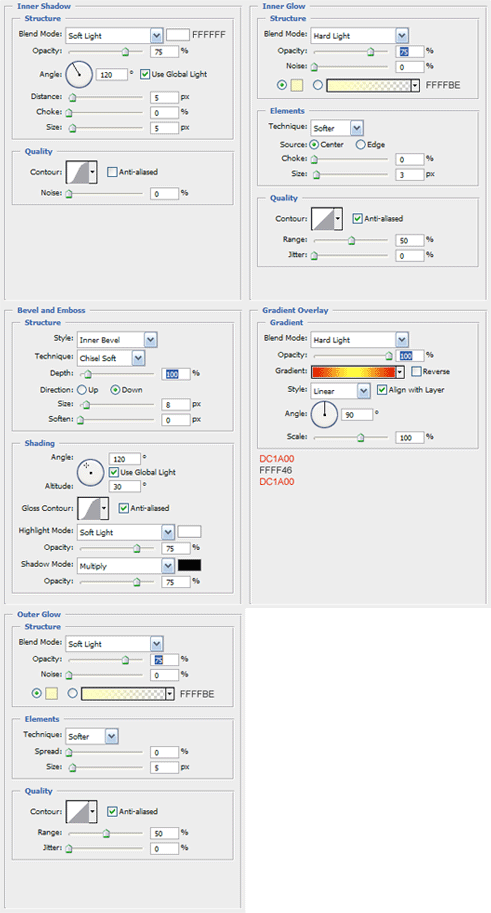
You should have something like the following. At this point you can tweek the gradient effect to bring more red into the cracks, change the bevel properties to add moredepth, or change the glow to make brighten cracks.

I hope you enjoyed this tutorial and find it useful.